
Rice Krispie Chocolate Chip Cookies became my kitchen obsession one rainy afternoon when I tossed Rice Krispies into my usual chocolate chip dough oh, the crunch! The kitchen filled with that buttery, chocolatey aroma as they baked, and one bite revealed the perfect mix of chewy centers, crispy edges, and those delightful Rice Krispie pops. I’ve served them at family movie nights, holiday spreads, and cozy evenings, and they’re always a hit. They’re simple, nostalgic, and oh-so-delicious ready to learn how to make Rice Krispie Chocolate Chip Cookies? Let’s get baking!
Table of Contents
Why This Recipe Works:
✔️ Perfect Texture – Soft, chewy centers with crispy edges and Rice Krispies for crunch.
✔️ Easy to Make – No fancy techniques, just classic cookie-baking with a twist.
✔️ Kid & Crowd-Friendly – A fun recipe that kids love to help with!
✔️ Customizable – Easily swap ingredients to make them gluten-free, dairy-free, or extra chocolatey.
The Story Behind Rice Krispie Cookies
While Rice Krispie treats have been a childhood favorite for decades, the idea of adding Rice Krispies to cookies is a lesser-known but brilliant twist. These cookies likely originated as a way for home bakers to experiment with textures, combining the buttery chewiness of classic chocolate chip cookies with the light, airy crispiness of puffed rice cereal.
A Brief History
- Rice Krispies were introduced by Kellogg’s in 1928 and quickly became a staple in American households.
- The famous Rice Krispie Treats were invented by Mildred Day in 1939, originally as a fundraiser recipe for the Girl Scouts.
- As home bakers began experimenting, Rice Krispies found their way into cookies, adding a delicate crunch that made them stand out from traditional recipes.
Why This Trend Is Still Popular
Even today, Rice Krispie cookies are a go-to recipe for many bakers because:
✅ They offer a fun texture contrast—crispy yet chewy.
✅ They’re easy to customize with nuts, white chocolate, or even caramel.
✅ They’re great for kids who love the slight crunch and lightness.
This recipe isn’t just a nostalgic classic—it’s a modern favorite that keeps evolving with new flavors and variations.
Ingredients You’ll Need
Before you start baking, gather all your ingredients to ensure a smooth and stress-free baking experience. These Rice Krispie Chocolate Chip Cookies use simple pantry staples, making them easy to whip up anytime!
Main Ingredients
- All-Purpose Flour (2 ½ cups) – The base for structure and chewiness.
- Baking Soda (1 tsp) – Helps the cookies rise and spread perfectly.
- Salt (½ tsp) – Enhances flavors and balances sweetness.
- Unsalted Butter (1 cup, softened) – Adds richness and helps create a soft texture.
- Brown Sugar (1 cup, packed) – Gives the cookies a deep, caramel-like flavor and chewiness.
- Granulated Sugar (½ cup) – Adds crispness to the edges.
- Large Eggs (2) – Binds everything together and adds moisture.
- Vanilla Extract (2 tsp) – Enhances the overall flavor profile.
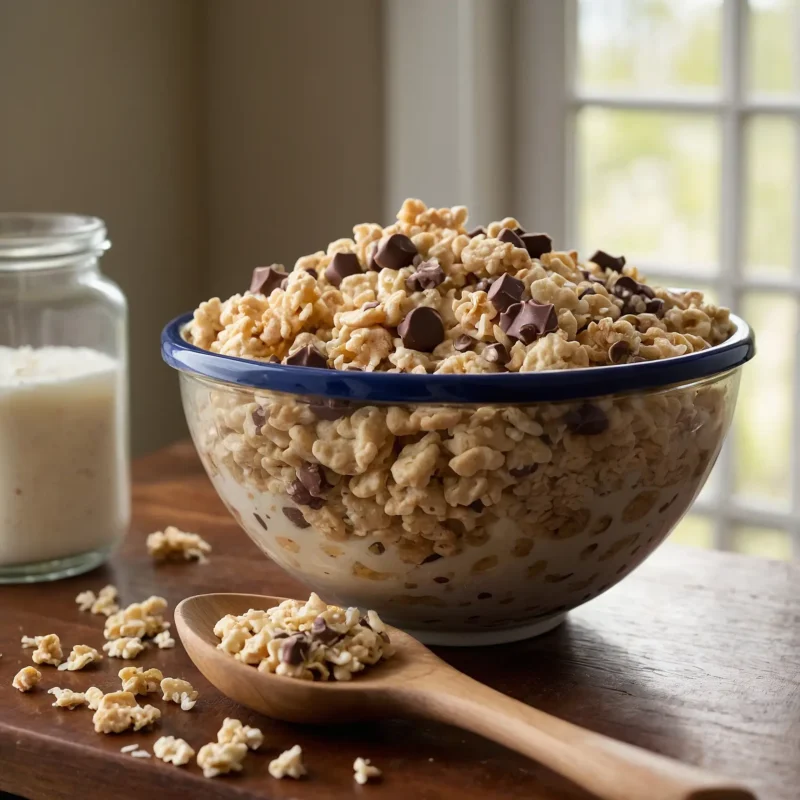
- Rice Krispies Cereal (1 ½ cups) – The key ingredient for a light, crispy texture.
- Chocolate Chips (1 ½ cups) – The classic addition for bursts of melty goodness.
Ingredient Notes & Substitutes
💡 Can I use salted butter?
Yes! If using salted butter, reduce the added salt to ¼ tsp to maintain balance.
💡 Can I make these gluten-free?
Yes! Swap all-purpose flour for a 1:1 gluten-free flour blend.
💡 What if I don’t have brown sugar?
You can substitute with all granulated sugar, but the cookies will lose some chewiness. Adding a tablespoon of honey or molasses can help!
💡 What type of chocolate chips work best?
- Semi-sweet chocolate chips – Classic choice, not too sweet or bitter.
- Dark chocolate chips – For a richer, less sweet flavor.
- Milk chocolate chips – Sweeter and creamier option.
- White chocolate or butterscotch chips – Fun variations!
Step-by-Step Instructions for Making Rice Krispie Chocolate Chip Cookies
Follow these easy steps to bake the perfect batch of Rice Krispie Chocolate Chip Cookies.
Step 1 – Preheat the Oven & Prepare Baking Sheet
Before mixing the ingredients, preheat your oven to 350°F (175°C). This ensures the cookies bake evenly.
- Place a sheet of parchment paper on the baking tray to ensure the cookies don’t stick and for easier cleanup.
- If you don’t have parchment paper, you can lightly grease the baking sheet with butter or non-stick spray.
💡 Tip: Preheating the oven properly helps cookies bake evenly and prevents them from spreading too much.
Step 2 – Mix Dry Ingredients
In a medium bowl, whisk together:
✅ 2 ½ cups all-purpose flour
✅ 1 tsp baking soda
✅ ½ tsp salt
Set aside—this step ensures the leavening agents are evenly distributed for perfect baking.
💡 Tip: Sifting the dry ingredients can help create lighter, fluffier cookies.
Step 3 – Cream the Butter and Sugars
In a large mixing bowl, beat together:
✅ 1 cup unsalted butter (softened)
✅ 1 cup packed brown sugar
✅ ½ cup granulated sugar
Use a hand mixer or stand mixer and beat for about 2-3 minutes, until the mixture is light and fluffy.
💡 Why does this matter? Creaming butter and sugar properly adds air to the dough, creating softer, fluffier cookies.
Step 4 – Add Eggs and Vanilla Extract
Next, add the eggs one at a time, beating well after each addition:
✅ 2 large eggs
✅ 2 teaspoons vanilla extract
Mix until the eggs are fully blended into the dough. This step helps create a smooth consistency while adding moisture and structure to the cookies.
Tip: Use eggs at room temperature for easier mixing and a more uniform dough texture.
Step 5 – Combine Wet and Dry Ingredients
Gradually incorporate the dry ingredients into the wet mixture. Mix on low speed or gently stir by hand until the ingredients are just incorporated. Avoid overmixing, as it can result in dense, tough cookies instead of a light and chewy texture.
Step 6 – Fold in the Rice Krispies & Chocolate Chips
Using a spatula, carefully fold in:
✅ 1 ½ cups Rice Krispies cereal
✅ 1 ½ cups chocolate chips
Mix just until evenly distributed, making sure not to crush the Rice Krispies—they should retain their crispiness for the best texture.
Tip: Want extra crunch? Stir in ½ cup of chopped nuts like pecans or walnuts for added texture.
Step 7 – Portion & Shape the Dough
Scoop out 1 ½-inch balls of dough using a cookie scoop or a tablespoon and place them 2 inches apart on a lined baking sheet. This spacing prevents them from spreading into each other during baking.
Tip: For cookies that are extra soft and chewy, chill the dough in the refrigerator for 30 minutes before baking.
Step 8 – Bake to Perfection
Preheat the oven to 350°F (175°C) and bake the cookies for 10-12 minutes, or until the edges turn a light golden brown.
Tip: If the centers look slightly underbaked when you take the cookies out of the oven, that’s a good sign! They will continue to firm up as they cool, resulting in a soft and chewy texture.
Step 9 – Let Cool & Enjoy
- Allow the cookies to rest on the baking sheet for about 5 minutes before carefully moving them to a wire rack. This helps them set properly and prevents breakage while they are still warm.
- Allow to cool completely for the best texture.
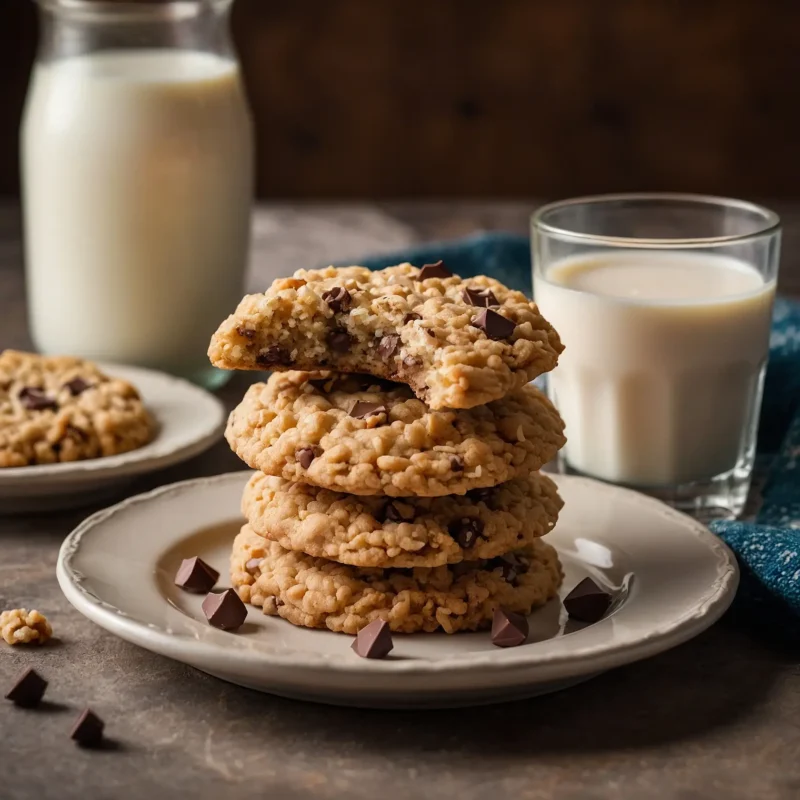
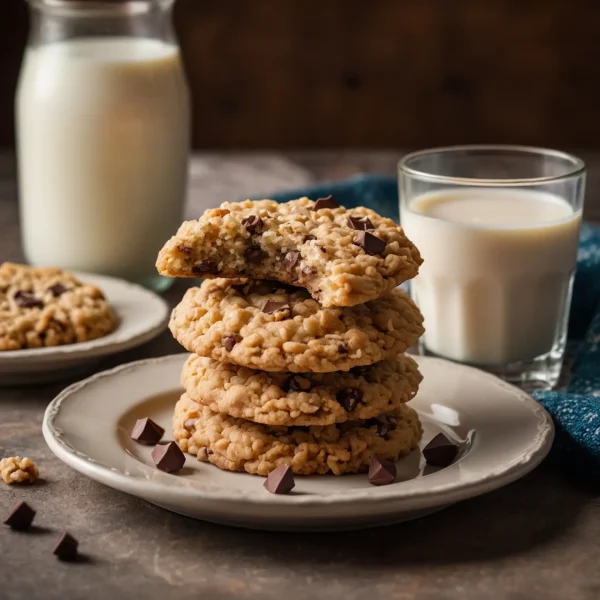
Now, grab a glass of milk and enjoy your crispy, chewy, chocolatey masterpiece!
Best Ways to Serve & Enjoy These Cookies
These Rice Krispie Chocolate Chip Cookies are already delicious on their own, but the right pairings can take them to the next level! Here are some great ways to serve them:
Classic Pairings
With a Glass of Milk – The ultimate way to enjoy cookies! The creamy texture of milk complements the crispy, chewy goodness.
With Coffee or Tea – A perfect treat for breakfast or an afternoon snack. Try them with a cappuccino, chai latte, or black tea.
With Ice Cream – Sandwich a scoop of vanilla, chocolate, or caramel ice cream between two cookies for an indulgent dessert.
Creative Serving Ideas
Drizzle with Melted Chocolate – Add extra decadence by drizzling melted dark, milk, or white chocolate over the cookies.
Make Cookie Sandwiches – Spread peanut butter, Nutella, or marshmallow fluff between two cookies for a fun twist.
Crumble Over Desserts – Crushed cookies make a great topping for ice cream, yogurt, or even cheesecake!
Storage Tips for Maximum Freshness
✅ At Room Temperature – Store cookies in an airtight container for up to 5 days. Add a slice of bread to keep them soft!
✅ In the Freezer – Freeze baked cookies for up to 3 months. Let them thaw at room temperature or briefly heat them in the microwave for a warm, freshly baked taste.
✅ Freezing the Dough – Scoop cookie dough balls onto a tray, freeze for 1 hour, then transfer to a bag. Bake straight from frozen, adding 2 extra minutes to the bake time.
Frequently Asked Questions
1. Can I freeze the cookie dough for later?
Yes! To freeze, scoop the dough into portions and place them on a baking sheet. Freeze for about 1 hour until firm, then transfer to an airtight bag or container. When you’re ready to bake, arrange the frozen dough balls on a baking sheet and bake as directed, adding an extra 1–2 minutes to the baking time.
2. How long do these cookies stay fresh?
Stored in an airtight container at room temperature, these cookies stay fresh for up to 5 days. For longer storage, freeze them for up to 3 months and thaw at room temperature before eating.
3. Can I make these cookies without chocolate chips?
Absolutely! You can leave out the chocolate chips or replace them with dried fruit, white chocolate, caramel chips, or nuts for a different flavor profile.
4. What’s the secret to getting extra crispy cookies?
For crispier cookies:
- Use more granulated sugar than brown sugar to create a firmer texture.
- Bake for an extra 2–3 minutes until golden brown.
- Let the cookies cool completely on a wire rack to set the crispy texture.
5. Can I substitute Rice Krispies with something else?
Yes! If you don’t have Rice Krispies, you can try:
- Cornflakes for a slightly crunchier texture.
- Puffed rice or quinoa for a gluten-free option.
- Chopped nuts for a crunchier, nutty variation.
6. Why did my cookies turn out flat?
If your cookies spread too much while baking, it may be caused by:
- Butter being too soft or melted – Use room temperature butter, not melted.
- Not enough flour – Make sure to measure accurately using the spoon-and-level method.
- Skipping the chilling step – If your dough is too warm, refrigerate it for 30 minutes before baking.
Chef Julia’s Message to Her Followers
“I’m so excited to share this Rice Krispie Chocolate Chip Cookie recipe with you! I wanted to create a cookie that combines the chewy, buttery goodness of a classic chocolate chip cookie with the light, crispy texture of Rice Krispies, and this recipe does just that. Every bite has the perfect balance of soft, gooey chocolate and a satisfying crunch. I can’t wait for you to try it—whether you enjoy them fresh out of the oven, dunked in a glass of milk, or as a fun treat to share with family and friends. Give it a go, and let me know how you like them!”
Rice Krispie Chocolate Chip Cookies
Equipment
- – Mixing Bowls
- Hand Mixer or Stand Mixer
- Baking Sheet
- Parchment Paper
Ingredients
Dry Ingredients
- 2.5 cups all-purpose flour
- 1 tsp baking soda
- 0.5 tsp salt
Wet Ingredients
- 1 cup unsalted butter softened
- 1 cup brown sugar packed
- 0.5 cup granulated sugar
- 2 large eggs
- 2 tsp vanilla extract
Mix-ins
- 1.5 cups Rice Krispies cereal
- 1.5 cups chocolate chips
Instructions
- Preheat the oven to 350°F (175°C) and line a baking sheet with parchment paper.
- In a medium bowl, whisk together the flour, baking soda, and salt. Set aside.
- In a large bowl, cream together the butter, brown sugar, and granulated sugar until light and fluffy, about 2-3 minutes.
- Add the eggs one at a time, mixing well after each addition. Stir in the vanilla extract.
- Gradually mix the dry ingredients into the wet mixture until just combined. Do not overmix.
- Gently fold in the Rice Krispies and chocolate chips until evenly distributed.
- Scoop tablespoon-sized balls of dough onto the prepared baking sheet, spacing them about 2 inches apart.
- Bake for 10-12 minutes, or until the edges turn light golden brown. The centers may look slightly underbaked but will firm up as they cool.
- Let the cookies cool on the baking sheet for 5 minutes before transferring them to a wire rack to cool completely.