Table of Contents
Friends, let me tell you about these mini quiches that have literally changed my breakfast game forever! These adorable, bite-sized flavor bombs are the ultimate crowd-pleaser that work their magic morning, noon, or night. I’m talking about perfectly portable, customizable little bites of heaven that will make everyone think you spent hours in the kitchen (when really, they come together in just 25 minutes!). Trust me, once you try these, you’ll wonder how you ever lived without them in your regular rotation.
Why You’ll Love This Recipe
- Endlessly Customizable: These mini quiches are like a blank canvas for your culinary creativity! Use whatever ingredients you have on hand to create your perfect flavor combo.
- Make-Ahead Marvel: Prep a batch on Sunday and enjoy stress-free breakfasts all week long. These little beauties freeze beautifully and reheat like a dream.
- Perfect Portable Food: Whether you’re hosting brunch, contributing to a potluck, or need grab-and-go breakfast options, these mini quiches are your new best friend.
- Impressive Yet Simple: They look fancy enough for special occasions but are actually foolproof to make – even kitchen newbies can nail this recipe!
Ingredients
All you need for these game-changing Mini Quiches are some pantry staples and whatever fillings make your heart sing:
- Eggs: The star of the show that creates that custardy, dreamy texture. Farm-fresh eggs will give you the most vibrant yellow color!
- Heavy Cream: Creates that silky, rich texture that makes quiche so irresistible. Half-and-half or whole milk works too if you want a lighter version.
- Cheese: The melty magic that brings everything together. Shredded cheddar, Swiss, or gruyere are all fantastic options, but feel free to get creative!
- Pie Crust: Use store-bought for convenience or homemade if you’re feeling ambitious. For a low-carb option, these work perfectly crustless too!
- Salt and Pepper: These simple seasonings enhance all the other flavors without stealing the spotlight.
- Mix-ins: This is where the fun begins! Cooked bacon, ham, sausage, sautéed spinach, mushrooms, bell peppers, caramelized onions – the options are endless!
Note: Complete measurements for all ingredients will be included in the recipe card below the article.

How to Make the Mini Quiches
Step 1: Prep Your Oven and Pan
Preheat your oven to 375°F and prepare your muffin tin by giving it a generous spray with cooking spray. If you’re using pie crust, now’s the time to roll it out. I usually aim for about ¼-inch thickness, then use a round cookie cutter or drinking glass to cut circles slightly larger than your muffin cups.
Step 2: Form the Crusts
Press those circles of dough into your muffin cups, gently pushing the dough up the sides. Don’t stress if they’re not perfect – that rustic look is part of their charm! Give each one a little prick with a fork to prevent bubbling. If you’re going crustless, just skip ahead!
Step 3: Pre-bake the Crusts
Pop those empty crusts into the oven for about 5-7 minutes. This quick pre-bake ensures you won’t end up with the dreaded soggy bottom! They should look just slightly set but not browned.
Step 4: Prepare Your Filling Mixture
While your crusts are having their moment in the oven, whisk together eggs and heavy cream until smooth and frothy. Season with salt, pepper, and any herbs you love. This basic mixture is your blank canvas – it’ll hug all your mix-ins perfectly!
Step 5: Add Mix-ins
This is where you get to play! Sprinkle your favorite fillings into each partially baked crust. My go-to combination is crispy bacon bits, sautéed spinach, and a little caramelized onion, but honestly, the world is your oyster here! Just make sure any meat is pre-cooked and vegetables are sautéed to remove excess moisture.
Step 6: Pour and Top
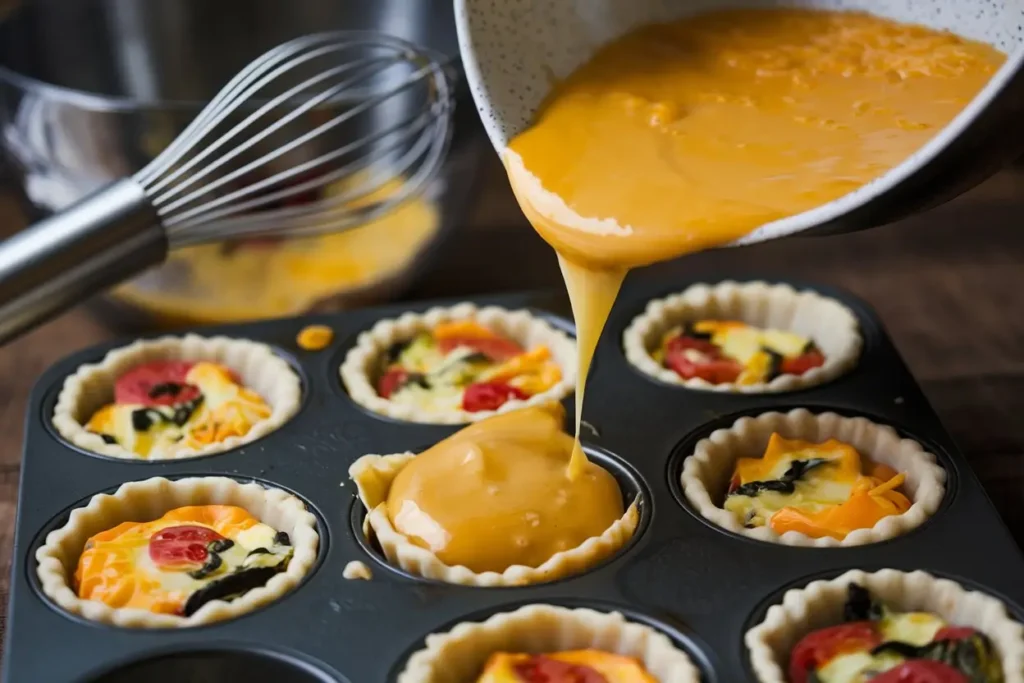
Carefully pour your egg mixture over the fillings, filling each cup about ¾ full. Remember, these little guys will puff up as they bake! Sprinkle cheese on top because, let’s be honest, more cheese is always better.
Step 7: Bake to Golden Perfection
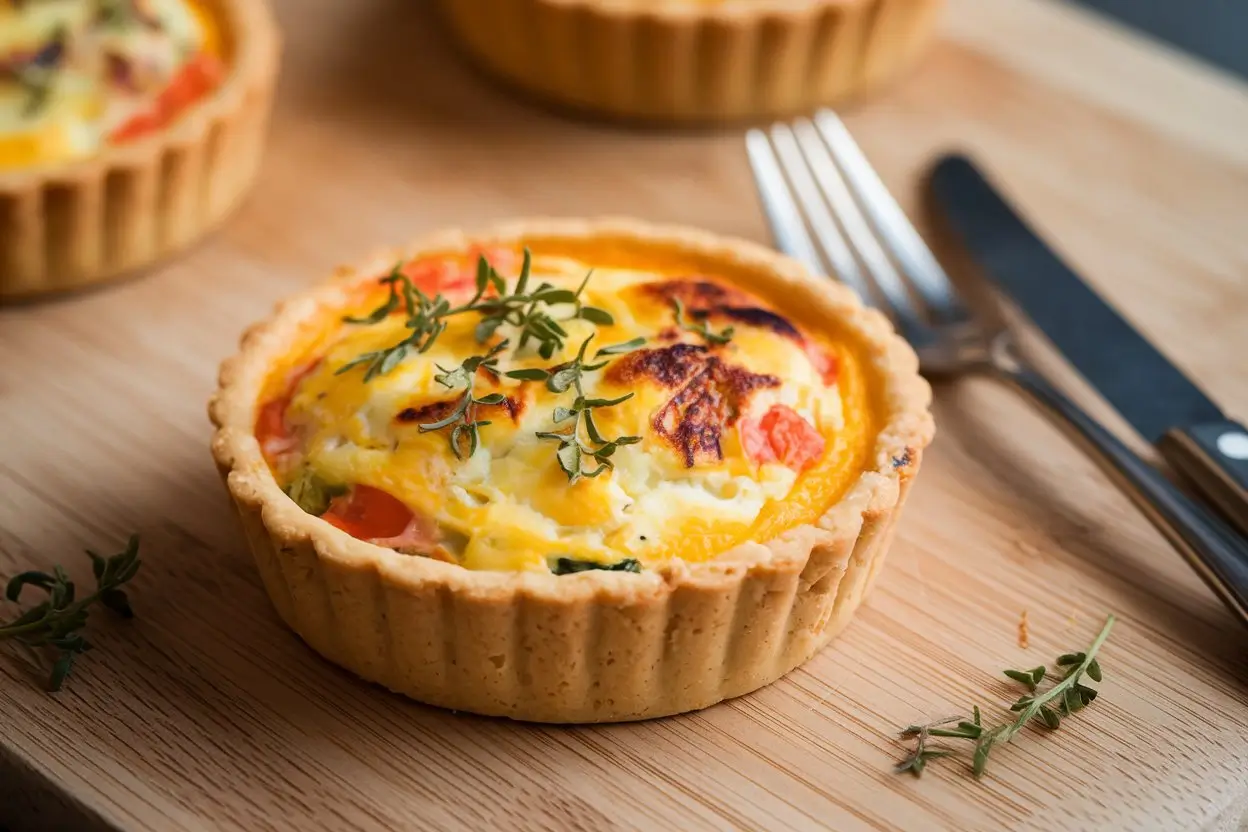
Slide that muffin tin into your preheated oven and bake for 15-18 minutes. You’re looking for that gorgeous golden top and slightly puffed centers. When you give the tin a little shake, the centers should be just set with maybe the tiniest jiggle.
Step 8: Cool Slightly and Serve
Let your mini masterpieces cool in the pan for about 5 minutes – this makes them much easier to remove. Run a butter knife around the edges and pop them out. Serve warm and watch them disappear faster than you can say “seconds, please!”
Pro Tips for Making the Recipe

- Cold Ingredients Work Best: Keep your pie crust cold until ready to use for the flakiest results. Even chilling your mixing bowl before whisking eggs can make a difference!
- Don’t Skip the Pre-Bake: Those 5-7 minutes of pre-baking the crusts might seem fussy, but they’re crucial for avoiding the disappointment of soggy bottoms.
- Sauté Veggies First: Always cook vegetables before adding them to your quiche mixture – this removes excess moisture that could make your quiches watery.
- Season Each Layer: For the most flavorful quiches, season both your egg mixture AND your fillings. Those little pockets of seasoning make all the difference!
How to Serve
These mini quiches are superstars on their own, but here are some ideas to create a memorable meal:
- Brunch Spread: Arrange on a tiered serving platter alongside fresh fruit, croissants, and mimosas for an Instagram-worthy brunch.
- Side Salad: Pair with a simple arugula salad dressed with lemon vinaigrette for a light lunch that feels fancy.
- Sauce it Up: Offer small ramekins of chipotle aioli, pesto, or salsa for dipping – these little flavor bombs take well to all kinds of accompaniments!
Make Ahead and Storage
Storing Leftovers
Once completely cooled, store your mini quiches in an airtight container in the refrigerator for up to 4 days. They make fantastic grab-and-go breakfasts all week long!
Freezing
These are freezer superstars! Place cooled quiches on a baking sheet and freeze until solid, then transfer to a freezer bag or container. They’ll keep beautifully for up to 2 months.
Reheating
For refrigerated quiches, a quick 20-30 seconds in the microwave works perfectly. If frozen, either thaw overnight in the refrigerator first or reheat from frozen in a 350°F oven for about 10 minutes until heated through. The oven method helps maintain that crispy crust!
FAQs
Can I make these mini quiches without a crust?
Absolutely! Crustless mini quiches are not only delicious but also a great low-carb option. Just be sure to grease your muffin tin exceptionally well, or use silicone liners to prevent sticking. The egg mixture will form its own little seal as it bakes. They’ll be slightly smaller without the crust but equally delicious!
What’s the best way to prevent soggy quiche bottoms?
The pre-bake method is your best friend here! Those few minutes of blind baking create a barrier between the moist filling and your crust. Another trick is to sprinkle a small amount of cheese on the bottom of each crust before adding other fillings – it melts during baking and forms a protective layer. Also, make sure any vegetables are well-sautéed to remove excess moisture before adding them to your quiches.
How do I know when my mini quiches are perfectly done?
Look for these three signs: they’ve puffed up slightly in the center, the edges are golden brown, and the centers are just set. If you give the muffin tin a gentle shake, the centers should only have the slightest jiggle. Over-baking can make them rubbery, so it’s better to pull them out a minute early rather than a minute late. Remember, they’ll continue cooking slightly from residual heat after you take them out of the oven!
Can I use a different dairy instead of heavy cream?
You bet! While heavy cream creates the richest texture, you can substitute half-and-half, whole milk, or even non-dairy alternatives like unsweetened almond milk. Each option will give you a slightly different texture – cream produces the most luxurious result, while milk makes a lighter quiche. If using plant-based milks, I’ve found that adding a tablespoon of cornstarch helps achieve that custardy texture we’re after.

